Painting Descent Cave Spiders


Check out this amazing tutorial from Massive Voodoo about how to paint shades of black

image
To Paint a highlight on the base: Take a light gray and paint a stripe up the much darker base. This will create the effect of light reflecting of of something metal or polished stone.
image
You can highlight the red symbols on the spiders backs with a lighter orange. The green spider is similarly highlighted with a little yellow blended into the green paint. Don’t add white to highlight the red unless you want some pink spiders!


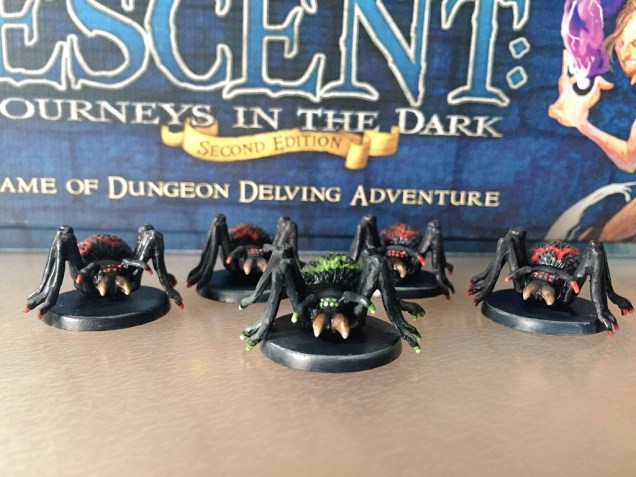
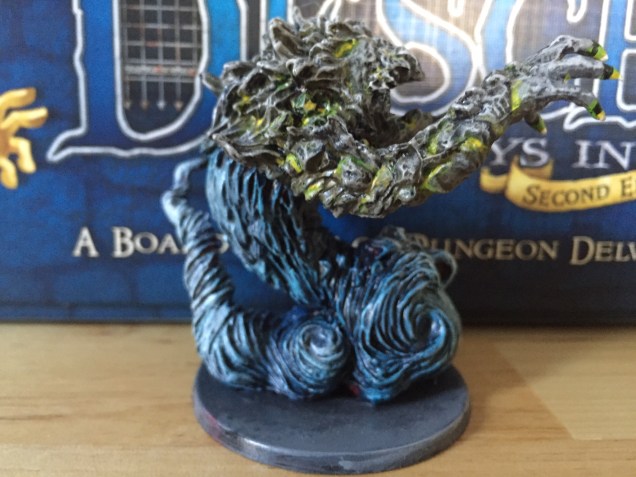
These Cave Spiders look deceptively easy to paint, but don’t let them fool you. Shades of black can be notoriously difficult to get right. For starters there are so many different shades from light gray to coal black. And Black can be warm or cold depending on the color scheme you choose for your miniature. A great resource for painters of all stages is the group Massive Voodoo. They did an amazing breakdown of how shades of black can be warmed to almost red or cooled to almost blue. I’ll post a link to that great resource. I chose to go with a warm black to better match the red symbols on the spiders backs. I also tried a cooler green tinted black for the boss spider.

Next comes the tedious task of trying to find the right shades and locations for the highlights. I used a glazing technique where you water down the paint to a very thin consistency and then paint layer after layer in the same place to slowly get a blended highlight. It’s a great way to get the smoothest blending but it’s a very time consuming technique  so if you are just trying to get the game painted and start playing ASAP then it may not be for you. I also similarly highlighted the tops of the head, legs, and antennas.

To create the spooky symbol in the back you’ll want to work in two steps. First highlight the black fur with a lighter shade all over the back. (This is where a wet pallet really starts to come in handy) When you are happy with how the fur looks take some dark red and draw whatever symbol you choose on the back. Then lighten that color (if your using red lighten with an orange paint) and dry brush only on the fur with the symbol. You can lighten more  and repeat for a more dramatic effect. I believe I lightened and dry brushed three times before I achieved the look I wanted.

The mouth was easy and consisted of a dirty bone base with an umber wash. Then I dry brushed a mix of dirty bone and white applying paint more heavily towards the bottoms of the the mouth. The claws are painted with the same colors as the symbol with red tipping to orange white.

P.S. I seem to be having some issues linking the website for Massive Voodoo through WordPress so here is the site address to copy if you need to

http://massivevoodoo.blogspot.com/2014/05/tutorial-painting-colour-black.html?m=1


Painting Descent Elementals

image
You will have to free hand the lava running down the bottom of the hands. If your not sure where to paint try this trick. Take a little (very) watered down white and let it drip from the inside of the fingers while you hold the miniature at a tilt to cause the white to leave a faint trail underneath the hand to the arms. That will guide you where to put you lava streams.
image
Darkening the bases of the finger tips will make it seem as if the claws get hotter towards the tips

image

image
I used the same lava technique but with a green base to represent the Boss Monster
image
I dry brushed the tail with a little pure white over the blue.
image
I used a light stone gray and dry brushed the earth part of the body. Then I added a little white to the mix and dry brushed the same area one more time.


These Elementals are one of my favorite miniatures in Descent 2nd E. But I prefer to take some artists liberties when painting them. The original picture shows them with fire on the outside and stone on the inside. I find that creates a too bright miniature that comes across a bit chaotic. Instead I made the outer part of the creature stone with deep rivers of lava peeking out from the cracks. This creates a great look and is easy for even a beginner painter to achieve.

  1. Start by painting yellow in all the cracks of the miniature.
  2. Add a bright orange starting the the edges of the yellow and slightly going up the walls of the cracks.
  3. Add a bright red to the very tip of the orange you just painted.
  4. Add a small line of white in the middle of the yellow.
  5. Let the miniature dry completely.
  6. paint the rocks a stone gray being careful not to cover up the work you just did in the cracks
  7. Add a little dark wash like Citidel’s nuln oil to just the gray painted parts. I like holding the miniature upside down so that the wash won’t run down into the lava and darken it.
  8. Then dry brush with your stone gray color.
  9. Add some white to the gray and dry brush one more time.
  10. To make the mystic green lava simply repeat the process using yellow, bright light green, and a slightly darker green paint instead of the yellow, orange, and red combo. You still do a little white in the middle of the lava.

Ill include a link to a video that does a good job of showing a visual step by step of this process. If the link isn’t working simply YouTube search: Cool Mini or Not tutorials how to paint lava.

Painting Descent 2nd Edition

image
A Descent Boss Monster

image

image
A Descent Normal Monster

imageimage

image
If you don’t want to put in the time painting two color schemes you can simply paint a red rim around one of the bases.


Excited to be kicking off a new project today! Descent 2nd edition is a huge (as in we’re going to need a bigger boat huge) semi co-op game with one player working as the forces of evil and everyone else teaming up to stop them. You get miniatures to represent most of the inhabitants of the dungeon as well as a mini for every hero. The miniatures are of decent quality although some mold lines had to be let go because they ran over some very fragile facial features. Removing them completely would have ruined the details so instead I will try to work them into the model as scars or other character building features. One of the neatest features of the game is that one model of every monster comes in a red plastic to represent a “The Boss” of that monster. I have chosen to go with a different color scheme to represent all boss level creatures, and the extra time really pays off when the game hits the table. These minis will be handled and used often so I have decided not to rebase most of them in an attempt to keep them durable. I also sprayed with a shiny acrylic coating and then dulled them with a layer of matte spray. This double spray should protect the paint from rubbing fingers for a long while.