Painting Rocket Raccoon’s Last Stand

Convention season is upon us again and so is the most exciting and busiest time for a miniature painter. Apologies for not posting more regularly lately. I’m in a race against time to see how many figures can be completed before Origins and Gencon. So any spare second I have I’ve been painting. But I will try to post weekly at least. There probably won’t be any board game miniature posts until after GenCon but I’m excited to show off what I’ve been working on instead. First off is Rockets Revenge from Knight Models.

image

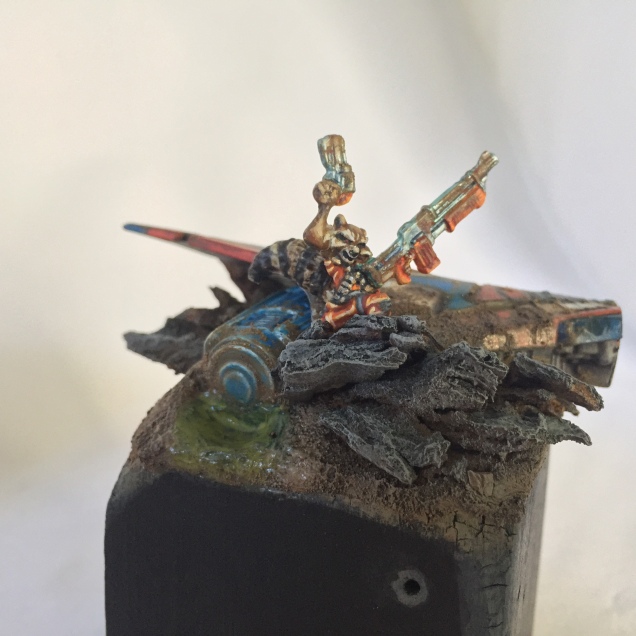
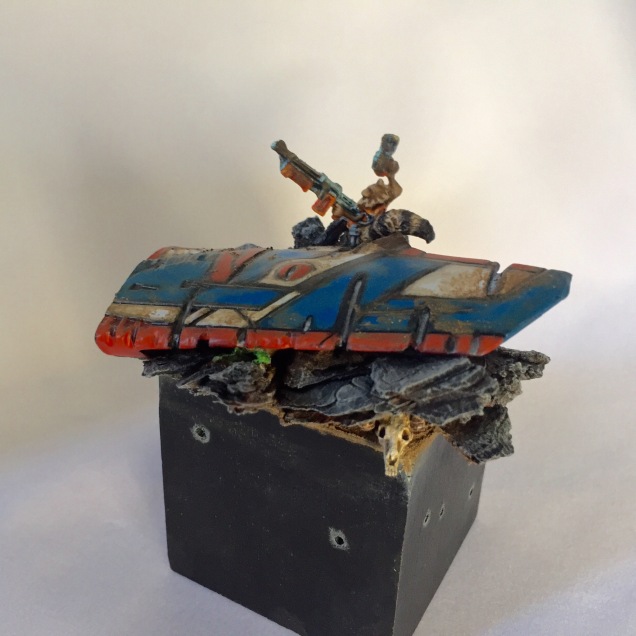
This picture has trouble conveying how tiny these miniatures are. At 34mm Rocket is barely as large as my finger making him one of the most challenging miniatures I’ve painted.

image

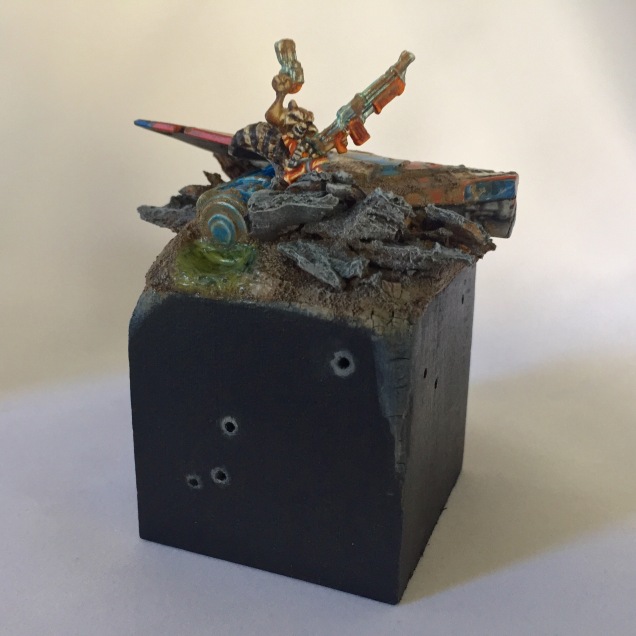
The base was made using a cheap Gaurdians of the Galaxy toy and sawing the wings off. Then using the plastic bits left over to create the engine. The rocks come from the bark of a very cool breed of pine tree that grows here and makes excellent looking stones. The base has also been burnt to create the scorch marks and bullet  holes.

image

Originally I had wanted to have Rocket stand on top of the ship rubble. But Knight Miniatures uses an extremely soft metal that bends and breaks easily. Trying to remove Rocket from his base damaged him so improvisation was needed. Even though at the time it seemed devastating, it’s a good lesson to learn. Whenever possible I will now try to work the base into the piece as a whole. Or at least cut off the base first before spending hours painting.

image

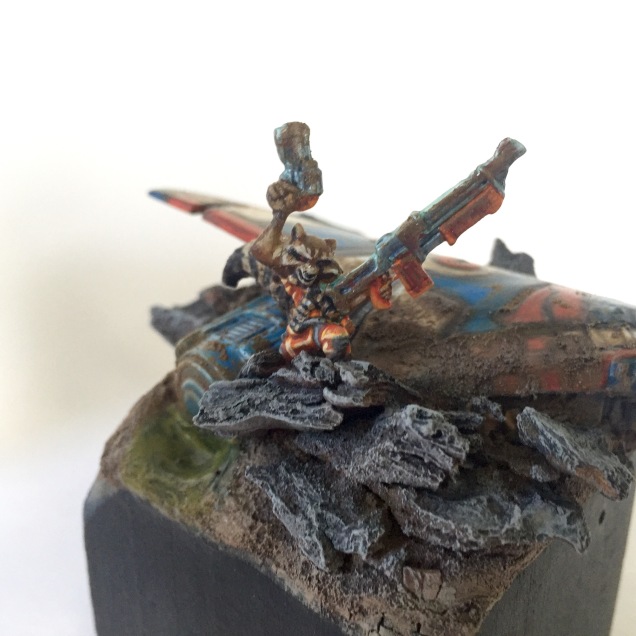
A Dremel helped in scouring the plastic toy creating a damaged look. Just make sure you wear protective glasses.

image

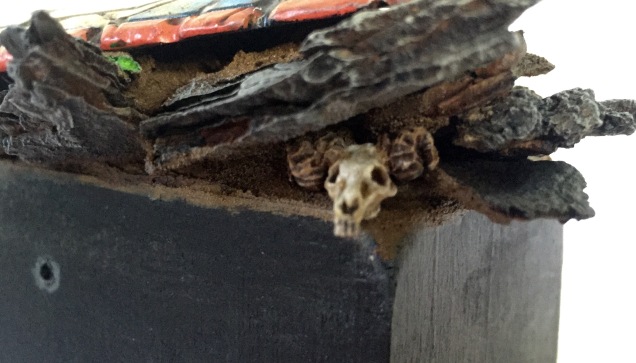
Then just some tiny details to fill out the scene like this skull and a tiny alien pod crushed under the wing.

image

As Knight Model’s new Marvel Miniature Game takes off I’m excited to what creativity others bring. And as new heros are constantly released there should be many more exciting things down the road for us all.

To check out the Marvel Miniatures game click here

WIP Wednesday

Spring is here and with it comes the season of conventions and competitions! As you read this miniature painters and sculptors are scrambling to finish pieces for the Iron Painter competition hosted by Wyrd minis. The Iron Painter is a crazy difficult competition where you are given a theme and have two weeks to come up with a miniature piece that explores it. Then your miniature goes head to head against another in a round of voting. Because your doing a new piece every two weeks with no way to guess the theme, it produces a mountain of  interesting pieces to browse through. It’s too late to enter now but I’ll leave a link to the forum below to the gallery of competing pieces to look through. I believe this weeks theme was “pink”.

I am also preparing for summer competitions, albeit at a much slower pace. I’m hoping to get 4 or 5 miniatures ready for judging by August.

image

Rocket is very close to being done. He has that great cartoon look I was aiming for but he’s just a tad to bright for his base. I’ll probably use some technical pigment to dirty him up and bring the piece together.

image

The base is about half way there but needs to be toned way down. I’ve placed primary colors to map out what I want the ship to look like. It’s a crashed ship so there will be a good amount of dirt and scratches showing in the end.

imageimageimage

Ive also started on a new bust from FER miniatures. By priming him black first I can use a white primer to help me see how light would hit the miniature from a certain angle. There’s a lot of open skin on the piece so it should help me practice my skin tone and blending. As well as some unusual lighting effects.

Hopefully Rocket will be wrapped by next week and I’ll be able to post a Step by Step (with more pictures of each stage) Until then look out for another Miniature Maker showcase coming soon. And to all you competing this summer remember to have fun and good luck!


Check out the Iron Painter 2016 competition


Painting Mice and Mystics Lily

My apologies for missing yesterday’s WIP post. It was in part due to the exciting news that Lily is no longer a Work In Progress but a finished piece and the next in our Painting Mice&Mystics series.

image

Lily is my personal favorite of the tiny heros you can play as. She doesn’t appear in the game right away but shows up in later scenarios to save the day.

image
The bases will be left unpainted from now on because I’ve decided to rebase all the pieces after they’ve been finished.
image
Sorry about the shadow of the phone. I’m saving up for a nice light box but until then the awkwardly lighted pictures will continue :p
image
The cape is done with a glazing technique. That means I watered down the original color and slowly added more layers. For the final layers I added a little white and yellow and a dark green wash in the folds.

Im very happy with the progress that I’ve made with blending, glazing, and building leatherwork. If I look back at older pieces, I can see the two brush technique really improving with each piece. The Two Brush Technique is where you take two similar shades of colors, paint them side by side and use a 2nd brush to blend the middle together.

image
The bow and arrows are birch tipped with red leather straps and feathers.
image
The white wood makes the red feathers really pop! It also helps break up the red and green and help keep the piece from the dreaded Christmas look (something you risk anytime you put red and green together)

I also was given the great idea of painting Lily’s bow in Birch by a friend. Never painting that kind of wood before I did some research and I came across a great article by Dagger & Brush. If you haven’t checked out this blog yet, but you love war gaming, you should definitely head over there. I’ll include a link at the bottom to the Birch tutorial. It’s easy to understand and has some great example pictures of the technique. Although his came out a very realistic Birch while mine is probably a step above camo, I’m still really happy with it as a first try. I hope to try more weapons and armor in unusual materials more often.

Here’s a link to the Dagger and Brush guide to painting Birch