I hope you are all warm and toasty on this wintery Wednesday. The kitchen has been crazy this week! (We’re already making a plan of attack for Valentine’s Day!) So unfortunately there hasn’t been any finished projects since last week. But there’s some exciting news on the horizon. A bad snow storm is supposed to hit this weekend, and a few feet of snow should be perfect for trapping me in my workshop and getting some serious painting done. Until then I have some Work in Progress shots from this week.
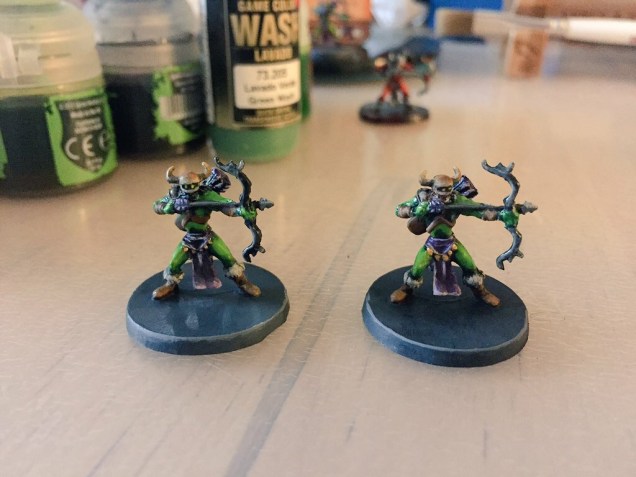
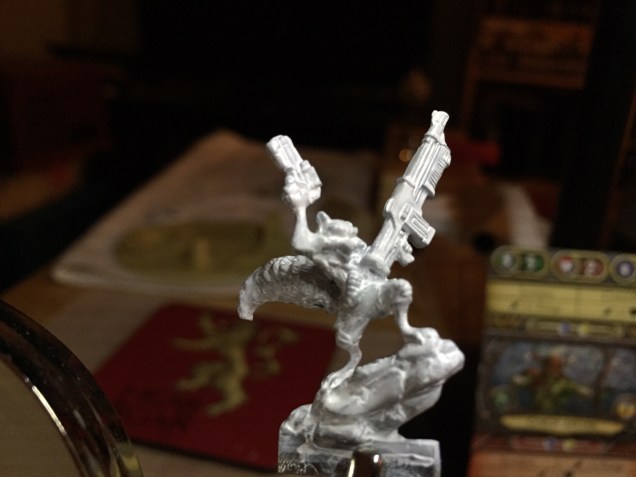
This Goblin Archer Boss is proving trickier than his comrades to get the highlighting to look natural. But once the skin is done everything else should be all downhill.These goblin archers are next up for the Descent Series and are almost done! Really loving how they are coming out.This is a personal side project that I’m doing for some practice and fun. It’s Marvel’s Rocket Racoon from Knight Models. He’s my favorite character from Guardians of the Galaxy and more importantly the best character in Marvel Vs Capcom. He’s pretty small and I broke his arm off when polishing him. After gluing my fingers together many times I got it back on and used some Green Stuff to reinforce the fix. I’ve decided to prime him white instead of my normal gray because I really want his colors to be bright and cartoony.This Cerebus Sabertooth Tiger Mini is from Wyrd Minis and looks pretty cool once it’s together. Getting it there was a nightmare though. I had a terrible time pinning it and there were some massive gaps that had to be filled in with “Green Stuff” and resculpted. The feet also had to be drastically altered since I’m creating a custom base for it. It certainly tested my patience but now I’m glad I went the extra mile fixing it up. Plus I had “Coming to America” playing in the background and that makes any rough job better.This Soul Carrier is from Wyrd Minis and the detail is fantastic. Not sure what colors I’m going to choose for the clothing but the fire will be green and gray. I’m also researching some very cool effects for the display base.
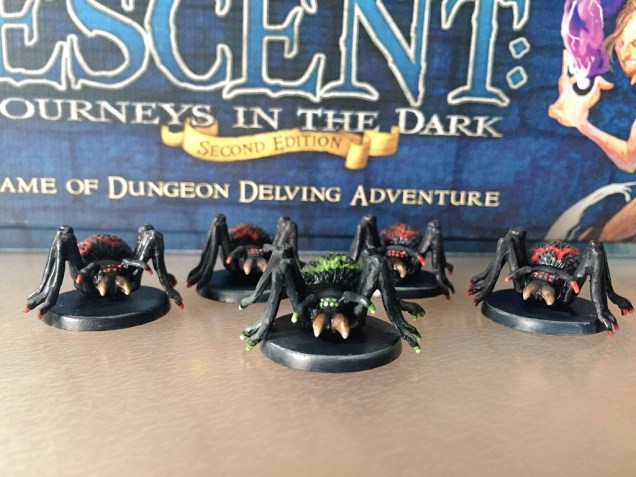
To Paint a highlight on the base: Take a light gray and paint a stripe up the much darker base. This will create the effect of light reflecting of of something metal or polished stone.You can highlight the red symbols on the spiders backs with a lighter orange. The green spider is similarly highlighted with a little yellow blended into the green paint. Don’t add white to highlight the red unless you want some pink spiders!
These Cave Spiders look deceptively easy to paint, but don’t let them fool you. Shades of black can be notoriously difficult to get right. For starters there are so many different shades from light gray to coal black. And Black can be warm or cold depending on the color scheme you choose for your miniature. A great resource for painters of all stages is the group Massive Voodoo. They did an amazing breakdown of how shades of black can be warmed to almost red or cooled to almost blue. I’ll post a link to that great resource. I chose to go with a warm black to better match the red symbols on the spiders backs. I also tried a cooler green tinted black for the boss spider.
Next comes the tedious task of trying to find the right shades and locations for the highlights. I used a glazing technique where you water down the paint to a very thin consistency and then paint layer after layer in the same place to slowly get a blended highlight. It’s a great way to get the smoothest blending but it’s a very time consuming technique so if you are just trying to get the game painted and start playing ASAP then it may not be for you. I also similarly highlighted the tops of the head, legs, and antennas.
To create the spooky symbol in the back you’ll want to work in two steps. First highlight the black fur with a lighter shade all over the back. (This is where a wet pallet really starts to come in handy) When you are happy with how the fur looks take some dark red and draw whatever symbol you choose on the back. Then lighten that color (if your using red lighten with an orange paint) and dry brush only on the fur with the symbol. You can lighten more and repeat for a more dramatic effect. I believe I lightened and dry brushed three times before I achieved the look I wanted.
The mouth was easy and consisted of a dirty bone base with an umber wash. Then I dry brushed a mix of dirty bone and white applying paint more heavily towards the bottoms of the the mouth. The claws are painted with the same colors as the symbol with red tipping to orange white.
P.S. I seem to be having some issues linking the website for Massive Voodoo through WordPress so here is the site address to copy if you need to